Cement Plastering Work is a combination of reasonable plaster, sand, portland cement, and water, normally applied to stonework insides and outsides to accomplish a smooth surface, while inside surfaces at times get the last layer of gypsum plaster.
Plaster is a small layer of mortar applied over the workmanship surface and it goes probably as a damp proof coat over the square stonework. Plastering similarly gives a finished surface over the stonework that is firm and smooth hence it works on the presence of the construction. The fundamental focuses of plastering are to safeguard the surface from air impacts, to cover the defective workmanship in stonework, to shroud porous materials, and to give a fitting surface to paint.
Cement Plaster is regularly applied to give ideal covering to the outside and inside surface of the wall. Cement plastering is typically given in a solitary coat or twofold coat. The technique for twofold coat cement plastering includes the accompanying 4 stages.
- Step-1-Production the surface prepared for plastering
- Step-2-Preparation for plaster
- Step-3-Giving first coat (or undercoat or delivering coat)
- Step-4-Giving second coat (or completing coat or fine coat)
Step-1 (Preparing The Surface For Cement Plastering)
- Hold all the mortar joints of the wall harsh, to keep decent attaching to hold plaster.
- Utilize a wire brush to scrub every one of the joints and surfaces of the wall with a wire brush, the wall surface doesn’t contain any oil or oil and so on left on the wall surface.
- If the surface is smooth or the plastering wall is old, then, at that point separate the mortar joint to a profundity of at least 12 mm to give a better holding than the plaster.
- If the projection on the wall surface’s remaining parts is more than 12 mm, wipe it out to keep a smooth surface of the wall. It will limit the utilization of plaster.
- For any pits or openings on a superficial level, fill it with accurate material ahead of time.
- Roughen the entire wall to be plastered.
- Wash the mortar joints and entire wall to be plastered, and make it wet for at least 6 hours preceding using cement plastering.
In most cases, Plaster Machine was used in plastering.
Step-2 (Foundation For Plaster)
- To keep up with the smooth thickness of plastering all through the wall surface, at first settle spots on the wall. A speck has a place with a fix of plaster with size 15 mm * 15 mm and a thickness of around 10 mm.
- At first, dabs are set on the wall on a level plane and afterward in an upward direction at a dividing of around 2 meters covering the entire wall surface.
- With the assistance of plumb-bounce, look at the verticality of dabs, one over the other.
- When the spots are set, the upward pieces of plaster nom de plume tirades are masterminded among the dabs. These tirades work as the measures for holding smooth thickness of plastering to be utilized.
Step-3 (Giving First Coat Or Undercoat Or Delivering Coat)
- For block brickwork the thickness of first coat plaster, for the most part, stays 12 mm and for substantial workmanship, this thickness varies from 9 to 15 mm.
- The extent of cement and sand for first coat plaster contrasts from 1:3 to 1:6.
- By utilizing a scoop, give the primary layer of plaster among the spaces created with the tirades on the wall surface.
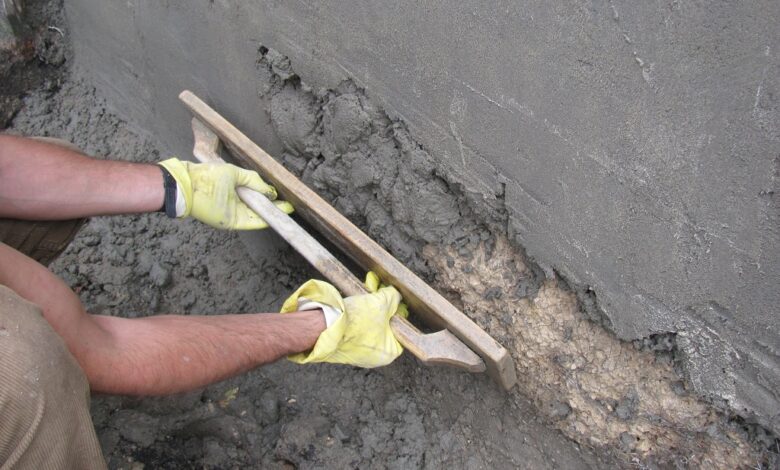
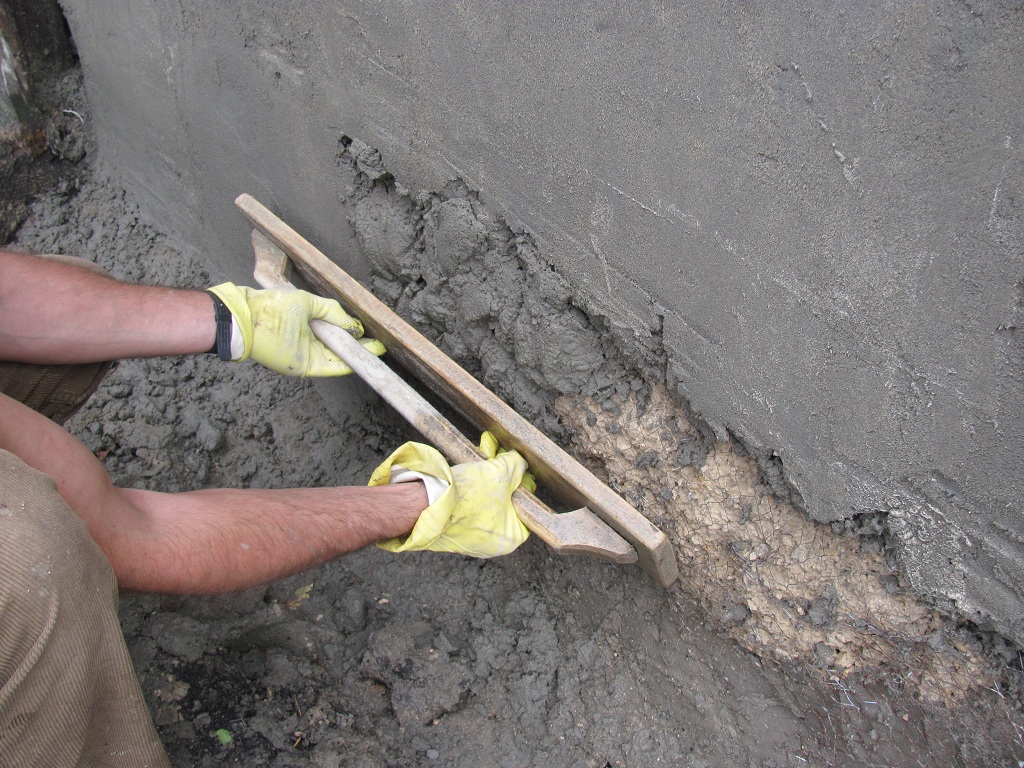
- The surface ought to be evened out with level wooden buoys and wooden straight edges.
- When the evening out is done, pass on the main coat to set yet not to dry and afterward roughen it by a scratching apparatus to foster a key to the second layer of plaster.
Step-4 (Giving Second Coat Or Completing Coat Or Fine Coat)
- The thickness of the second coat or completing coat might contrast from 2 to 3 mm.
- The extent of cement and sand for second coat plaster contrasts from 1:4 to 1:6.
- Preceding give the subsequent coat, soggy the principal coat consistently.
- Give the completing coat wooden buoys to an ideal uniform surface and apply the last little detail with a steel scoop.
- If conceivable, the completing coat ought to be given beginning from the surface’s top towards the base and completed in one activity to eliminate joining marks.
When the plastering work is finished, water ought to be sprinkled over it to save wet for at least 7 days to keep up with strength and hardness.
Benefits Of Cement Plastering:
- If cement is appropriately blended and applied, a plaster covering makes a more grounded and more tough wall finish.
- It is utilized on both interior and outside surfaces.
- This plaster is not a rust inhibitor.
- It has pretty much warm conductivity.
- Likewise, has pretty much indistinguishable acoustics properties.