
Making an excellent flower arrangement can be fun and simple. From collecting focal points for your impending wedding or shower, making a bouquet to go with your chocolate Mother’s Day present, or masterminding locally acquired flowers to light up your home — here are 12 significant hints for making a dazzling flower arrangement. Choose the most Beautiful bouquet of flowers for your occasion.
Stage 1. Pick the Ideal Flowers
An excellent flower arrangement begins with the right flowers. Start by choosing the fundamental tone for your arrangement. Pick 2-3 flowers with differing shades of a similar tint to complete one another. Then, at that point pick one more blossom in a differentiating tone, to make a fly of energy.
Stage 2. Add Surface to Your Decorative layout
Vegetation and fillers, similar to plants, lisianthus, eucalyptus, or poms, are an incredible method to make surfaces and add shape to your flower arrangement. We decide to utilize white wax flowers, to go without our white mums, and silver dollar eucalyptus for our base plant life. If that wasn’t already enough, wax flowers radiate a brilliantly light citrus fragrance once they begin to heat up.
Stage 3. Accumulate Your Apparatuses
Before you start, assemble your apparatuses, with the goal that all that you need is promptly accessible when you start. You will require a jar, flower scissors or a sharp paring blade, clear botanical tape (or ordinary tape limited), and several vacant cans. In case you are working with roses, you might need to use a rose stem cleaner for stripping thistles.
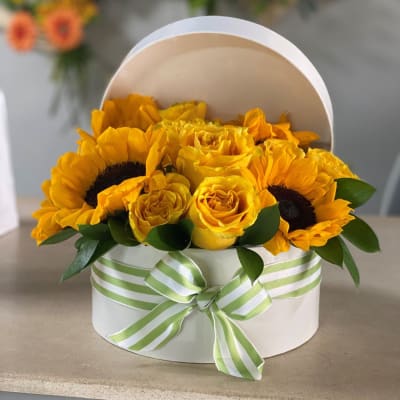
Stage 4. Select a Compartment
Picking the right jar for your flower arrangement is nearly just about as significant as picking the right flowers. Think about the tallness, volume, and wanted feel. Tall arrangements, or ones that incorporate flowers with substantial heads, require a jar that will offer sufficient help (in any case your flowers will hang). In case you are a fledgling, jars with a pitch will be more difficult to utilize because the stems will kick out.
Stage 5. Cycle Your Flowers
Several hours prior, cautiously unload your stems. Occupy your pails with room temperature water. (Water that is too hot or too chilly will stun the flowers.) Add flower food to the water. Trim the stems a bit, and afterward, put together the sprouts by type before setting in the cans. Appropriately preparing your flowers will guarantee that they have the opportunity to come to room temperature, hydrate, and open a bit.
Stage 6. Settle on Shape
Preceding beginning your arrangement, settle on your ideal shape — three-sided, roundabout, bow, vertical, or level. Your shape will generally be impacted by the kinds of flowers and style of the jar that you pick.
Stage 7. Make a Lattice
Utilizing clear botanical tape, make a spasm tac-toe framework across the highest point of the jar and secure the tape about a large portion of an inch down the side of the jar. (You’ll need it to overhang enough to adhere safely to the container, however short enough so it isn’t effectively apparent by admirers.) The tape matrix will go about as an establishment — it assists you with dividing the flowers equally as well as helps in supporting and holding the flowers set up as you go.
Stage 8. Trim the Stems
Cut each stem at a 45-degree point just before you are going to arrange it in the jar. This point gives the sprouts more surface region for engrossing water than a straight-across cut. A calculated cut keeps the origin from suctioning to the lower part of the compartment. It additionally prevents air rises from framing at the base, which may somehow keep the flower from getting the water it needs.
Stage 9. Start with the Vegetation
Fill your container half loaded with water that has flower food in it. Start your flower arrangement by adding a stem of your vegetation to each segment of your framework. This will fill in as the base. Freely weave the stems together with the goal that they interweave and stay set up.
Stage 10. Arrange Flower from Biggest to Littlest
Presently the pleasant part — adding the flowers! Start with your bigger blossoms. These will be the point of convergence of the arrangement and will assist with making the general shape. Then, at that point work in your more modest complement flowers. Make certain to turn your container as you proceed to modify depending on the situation. This guarantees that your result is delightful from each point. Whenever you are finished masterminding, finish the container off with water, yet ensure it doesn’t cover any leaves.
Stage 11. Handle the Roses with Care
Roses add a heartfelt touch to any arrangement, however, they can regularly be fussy to work with. While choosing roses, make certain to feel the head. The blossoms ought to be open, however firm. In case they aren’t pretty much as open as you might want, just blow into the top and afterward tenderly quill the petals out. Before adding the roses delicately eliminate the peripheral petals (monitor petals), that may be shriveled or marginally stained. Trim the roses just before setting them in the container as the stems will in general scab over rapidly (this scab will keep the roses from getting the water they need).
Stage 12. Putting Your Flowers In plain view
Flowers can be an extraordinary expansion to any living space. The best spot to show a decorative design is in a cool spot, out of direct daylight. An all-around kept jar of flowers will commonly last somewhere in the range of 5-7 days.
In case you are making arrangements for an uncommon occasion, like a wedding or party, start close to a couple of days earlier. Completed arrangements ought to be put away in a cool, dim space. However, they ought not to them be put in a cooler that has been utilized for food stockpiling since it can make the flowers deteriorate quicker.
Gift your loved ones with elegant Birthday flower bouquets.